9/30/13

How to enable CUDA in Linux (Ubuntu) for Blender

You can easily enable CUDA in Ubuntu. CUDA is capable of delivering faster render in supported GPU.
First of all make sure that you have CUDA supported Nvidia graphics card. If so connect to Internet,

Open Ubuntu software center.
Go to editsoftware sources→other software
and turn on
Canonical partners and independent
Save and close.
Open terminal and type
“sudo apt-get update” .
Press enter and give password for root. Wait for the update to finish. Then type
“sudo apt-get install”
Press enter and wait for the installation to finish. Close the terminal and reboot.
You can use Ubuntu DVD also if you haven't internet connection. Just turn on DVD as installation media.
Open Ubuntu software center.
Go to editsoftware sources→Additional drivers
And look for available nvidia drivers. If found any install the latest proprietary driver. (you wont get the latest as from the developers site).
If you can't find any drivers,
In the Ubuntu software center search for “ additional drivers” and click on that link. Install or use this source. Restart your computer and repeat the steps.

Once installed you need to restart your computer to get the driver to work properly.
Open a new Blender, turn on CUDA and do a test render with GPU. You will get the GPU render.
If the render yields only black output you need to add some libraries.
Open terminal and type

“sudo apt-get install freeglut3-dev build-essential libx11-dev libxmu-dev libxi-dev libgl1-mesa-glx libglu1-mesa libglu1-mesa-dev”

then
“sudo apt-get update”
“sudo apt-get install”
Reboot your computer. CUDA will work perfectly.
Some times you may not get the correct CUDA rendering. Then you need to update Blender first. Update nvidia driver manually.

Update nvidia driver manually.

You can get the latest nvidia driver by manual installation. But you need to manually install the driver whenever you update your Linux kernel.
Download latest nvidia driver from manufactures website. Select the correct version suited for your system (32/64).
Copy it in desktop and rename to nvidia.run
Press CTRL+ALT+F1.
Login with your user name and password.
Then type
sudo service lightdm stop”
then
“cd Desktop”
“sudo ./nvidia.run”
carefully follow the on screen instructions and install the driver.
You will get several error message. Proceed further by clicking ok until you reach installation can continue.
Type
“sudo reboot”.
After reboot repeat the process from CTRL+ALT+F1
Follow the onscreen instructions and you can successfully install nvidia driver.
 Once finished either you can restart or start using your desktop by typing
sudo service lightdm start”

9/28/13

Glass bottle in Blender Modeling tutorial

Hi. In this tutorial you will learn about the basic modeling tricks in Blender. We will discuss about the modeling of a photo realistic glass in Blender. Starting from a cylinder we will gradually add more details to the mesh.

Difficulty      : Beginners
Software      : Blender 2.68 a
Total time     : 15 minutes
Download the finished scene file  :  Download .blend file
Topics covered.
  • Primitive -Cylinder 
  • Mesh editing 
  • Edge loop cut and slide
  • Bevel edge 
  • Edge loop 
  • Fill hole 
  • subdivision modifier
  • Solidify modifier 
  • Glass material 
Glass Bottles in 3d
In the next part we will discuss about photo realistic rendering (studio lighting) set up in Blender.


Here is the quick text version
  • Open blender and delete the default cube.
  • Create a new cylinder from add object menu. (add>mesh>cylinder).
  • Change the depth (from tool box) to 6. Also turn on smooth preview.
  • Locate the object property panel in the right side, change the name to glass bottle.
  • Under display turn on wire and draw all edges.
  • Change to edit mode. Press 'a' to deselect all vertices.
  • Jump to front orthographic view and turn on wire frames.
  • In the tool shelf find loop cut and slide (you can find at add tab just below extrude).
  • Click it and create a cut at the center of the cylinder.
  • Change the number of cuts to 6.
  • De select all.
  • Select the bottom vertices (use b) and scale it to 0.75.
  • Select the second edge loop and move it down ward (z=-3.9).
  • Also select the 3rd edge loop and move it downward (z=0.9).
  • Select the 4th edge loop and move it to the center cut.
  • Select the 5,6 and 7th edge loops and scale it in z axis (z=0.3) and move it towards the top edge loop.
  • Select the 6th edge loop and scale it to 0.45.
  • Select 7th and 8th edge loops and scale it to 0.65.
  • Select the 4th edge loop and scale it to 0.75.
  • Change to edge mode and press ctrl+b to bevel and drag. Change the offset to 1 and segments to 4.
  • Select one edge from 2nd and 3rd edge loops and press ctrl+e and chose edge loop.
  • Do a bevel again.
  • Select the 5th edge loop and bevel it with 6 segments. offset 0.33 Also press smooth vertex under tool shelf.
  • Select 6th edge loop and bevel it.
  • Also do a bevel for 7th edge loop.
  • Change to solid mode then select the bottom and top faces of the cylinder and delete.
  • Then add a subdivision modifier and apply.
  • In the edit mode select the bottom edge loop and press 'f' to fill the hole.
  • In the object mode add a solidify modifier. Change the thickness to 0.07. Click apply.
  • Try smoothing the top edges a little bit.
  • Move the bottle in z=3
  • Use the origin to the 3d cursor.
  • Save the scene.
  • You can add a glass material under cycles for rendering.
In the next part we will discuss about studio lighting in Blender.
Some Blender fluid simulation renders

9/23/13

Windows vs. Linux in 3d rendering

Which operating system is the best for rendering? A question I often ask and search; I think it is often asked by you also. Ok, what is the answer?
In my experience Linux is 1.62X or 62% faster than windows. That means Linux can render more than 3 frames where Windows can render only 2 frames at a given time. Unfortunately I don’t have a Mac computer, so it is not in the comparison list.
The operating system or OS included in this test are
  • 1. Microsoft Windows 7 64 bit
  • 2. Ubuntu studio (Linux) 13.04 64 bit
3d application used
  • Blender 2.68 a 64 bit
Rendering software used
  • Cycles render (pre installed with Blender).
All the tests are done on a multi boot single laptop. The hardware configurations are
  • Dell XPS 14 laptop
  • Intel core i7 processor with 1.74 GHz speed.
  • NVidia GT 425M Graphics card
  • 4 GB DDR3 RAM 1333 MHz
  • 500 GB HDD 7200 RPM
Display Drivers used,
  • NVidia display driver 314.07 for Windows 7
  • NVidia Binary display driver 310 for Ubuntu
You can see, the hardware components are identical. The scene file used is the same for both operating systems. 3d program used is the same for both OS.
Here is the final render.
rbcs on glass bottle
Here are the details of the scene.
  • A photorealistic (?) glass bottle with studio lighting.
  • Dynamically driven RBCs are present inside the bottle.
  • All the materials used are Cycles shaders.
  • Indirect lighting with full global illumination.
  • Total samples of 1000 are used in rendering.
  • Total number of polys includes 8072. Total size of the scene is 1.64 MB.
  • The final output is HD 720P i.e. 1280x720.

Conditions
Windows 7 64 bit
Ubuntu studio 64 bit
Before optimizing the PC
Total RAM usage
1.52 GB i.e. 38% 360 MB i.e. 9%
After optimizing the PC
Quit unwanted programs and services, total RAM usage
1.06GB i.e. 26.5% No optimization performed
After opening the scene in Blender total RAM usage 1.48 GB 37% 548 MB 13.7 %
During rendering RAM usage 1.44 GB 36% 520 MB 13%
During rendering CPU used for Blender 98-99% Rest is reserved for system. 97-98% Rest is reserved for system
Total render time 18 minute 12 seconds 11 minute 16 seconds

So Linux is the winner in 3d rendering race.
Unfortunately CUDA rendering is not working in Ubuntu studio (I need to add some CUDA libraries in Ubuntu). So there is no test for CUDA or GPU rendering. May be in some other time.

Update

OK, I successfully updated my CUDA driver in Linux.See how I enabled CUDA in Ubuntu Now it is perfectly working. So what? I rendered the above scene in Blender using GPU in both Linux and Windows. Surprisingly the result is almost same! A slight performance gain in Windows.

Windows 7 64 bit
Linux Ubuntu Studio 64 bit
GPU rendering (CUDA)
12.53 Minutes
12.58 Minutes
So for GPU rendering, Windows 7 64 is the winner (with photo finish).
I think it is because the CUDA driver and graphics card driver have better optimization in windows than Linux.

Conclusion

According to my hardware specification Ubuntu CPU rendering is the fastest.
Here is the final comparison,
1st prize
Ubuntu 64 CPU rendering
  11.16 minutes
2nd prize
Windows 64 GPU rendering
12.53 minutes
3rd prize
Ubuntu 64 GPU rendering
12.58 minutes
4th prize
Windows 7 64
18.12 minutes

I also noticed that Maya also have a clear performance boost in Linux environment. But Maya will work only in RPM based Linux environment. For Maya Cent OS is the best.
I don’t know about Mac OS.
Have you ever feel slow rendering? Try switching your operating system first. Then upgrade your hardware.
So what you think? Post your comments and result below.

9/14/13

Waving flag-cloth stimulation in Blender

India celebrated 66th Independence Day on August 15 2013. In honour with my country I am giving a free Independence Day template for Blender users. And also a full length tutorial about Independence Day theme. This template is based on Indian theme you can easily change it to suits with your country. If you are eager to render out just download the blender file. If you have enough time, watch the video tutorial and create from scratch.
Difficulty : Beginner
Software : Blender 2.68a
Download : independence Day Blender template. (You can use it with your commercial project. Do not redistribute in any form. You can directly link to this page instead.
clip_image002
In this tutorial you will learn about
  • Adding text in Blender
  • Modifying text in Blender
  • Interactive changing of text properties (font, letters etc.) in Blender
  • Basic material editing in Blender
  • Camera animation in Blender
  • Cloth stimulation/ flag stimulation in Blender
  • Lighting and rendering with cycles in in Blender
  • Open a new blender scene and delete the default cube.
  • Add a text object (add>text, shift + A> text).


9/11/13

Render Layer in Cycles Blender tutorial

Blender is an awesome free 3d application which provide similar functionality like Autodesk Maya, 3ds Max and Cinema 4d. Blender is a powerful easy to use 3d application if learned wisely. If you are a user of other 3d application you may get confused with nonstandard GUI, keyboard shortcuts and lack of well detailed documentation.
I was one of the failed Blender climbers who tried several times Blender before. But being stuck with Autodesk Maya, it was a pain to learn other 3d software. I even tried Cinema 4d which is very easy to learn but failed. So I understood that Blender is not hard but my love for Maya is so strong. So I just started using Blender in my home and production and soon I get used with Blender. Now I can make motion graphics with Blender easily and am still learning it. Anyway during my experiments with Blender I found that there are so many gaps in the area of Blender tutorials. So I am adding more tutorials about Blender.

blender render layer
Enough introductions. We can now learn to use Blender render layers efficiently in production. Don’t expect very complex set up, but I will guide you through three cubes in a scene and with render layers. It will be easy to follow and understand. I am adding a text version but I recommend watching the video tutorial.

Author : FermiCG
Software : Blender 2.68a
Difficulty : Beginner
Download : Render Layer cubes finished.blend
Blender has a well coded render layer, render passes and compositing work flow. Once you learn how things works inside Blender it is easy to use and straight forward than Maya’s render layer system.
This tutorial is based on blender 2.68a.But 2.6x series will work fine. If you don’t have blender download it free from blender.org.
 
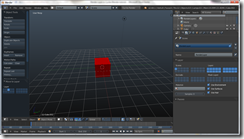
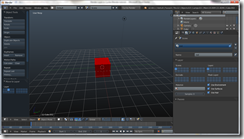
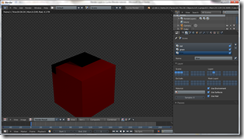
Start with a new scene. You will get a default cube, camera and a light. Select the cube and add a new material and change the colour to red. (Find the material tab and press the + button and add a material. Change the diffuse colour to red.). materials in blender
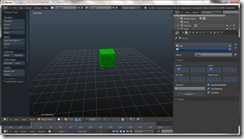
In viewport duplicate the cube (shift +d) and delete the existing material by clicking – button on material tab. Add a new material and change colour to green.
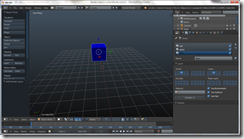
Duplicate the cube again and replace the material with blue one.
Place the cubes in such a way that they intersect each other. See the image.
materials in blender
Press 0 to look through the camera. If needed, adjust the camera so three cubes are in focus.
materials in blenderWe are going to render the scene with cycles. So change to cycles render. Set the quality and dimensions. Optionally you can turn on transparency and RGBA. Press render and see how the render looks.
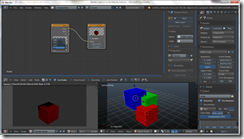
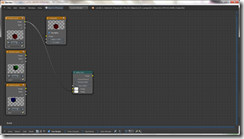
camera in blenderJump to composite mode and see the connections. You will get a render layer node connected to composite node (just turn on nodes). We need to get three cubes in three different render layers. Back to default view.
composite in blenderIn order to get render layers properly, we need scene layers also. So select the green cube and press M and select 2nd layer. This will cause the green cube to be in 2nd scene layer.
layers in blenderSelect the blue cube and press M and select 3rd layer. You can click on each scene layer to confirm they are in correct order. Select first layer and render. Now we have the red one with lighting. Select second layer and render. 2nd and 3rd layer won’t have any lights or shadow. Select 1, 2 and 3 layer (shift select) and render again. We will get all the cubes with light and shadow.
We successfully created scene layers. But we need render layers. So find the render layer tab in properties menu.
layers in blenderYou can see a drop down window with render layer inside and “+, -“sign outside. This is the render layer tab. Below that you can see layer tab. Expand it and you will get scene, layer, exclude and mask with 20 columns each. They are different render layer settings. The first one scene is same for the scene layer in viewport. You can click on 1, 2 and 3 scene layer to check. The layer in the right is actual render layer. So select the 1st scene layer and rename the render layer to red. Also select the 1st column in layer. Make sure you are not selecting anything else.
layers in blenderSelect the 2nd scene layer and add a new render layer by pressing + button. Rename to green. Select the 2nd column under layer.
render layers in blenderSelect 3rd scene layer and add a new render layer. Rename it to blue. Select the 3rd column under layer.
Select all the three scene layer and render.
render layers in blenderBlender will render the cubes one after other. You may see black holes in render. You will get something similar to this.
render layers in blender
black hole in blenderSwitch to composite view. You can see render layers is connected to composite node. Select the render layers and click on the layers and chose different layer. You can use this for further compositing.
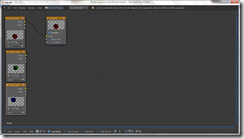
node editor in blenderLeave it to red. Duplicate render layers 2 times (shift +d) and change the 2nd one to green and 3rd to blue. (Shift+ backspace for full view).
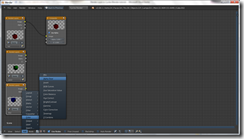
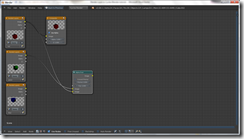
render layer nodes in blenderWe need to combine these layers. In order to do so add an alpha over node (add>colour>alpha over)
Now connect the image of red to the bottom image of alpha over node.
alpha over node in blenderConnect green image to the top image of alpha over node.
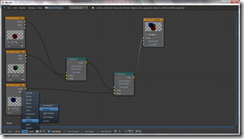
alpha over node in blenderAdd another alpha over node. Connect the blue image to bottom image of 2nd alpha over node. Also connect image of 1st alpha over to the top image of 2nd alpha over node.
alpha over node in blenderNow we need to connect the 2nd alpha image to the composite node. You can lose the connection between red layer and composite node.
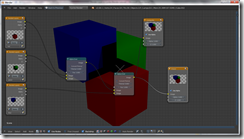
connection in blenderNow we need to check our composition. Add a viewer node. (Add>output> viewer)
 viewer node
Connect the second alpha over image to the image of viewer node.

backdrop in blenderAlso turn on backdrop.
final compositNow we have the composited image. You can swap the connection between render layers with alpha over node. But still you won’t get the original output. The black hole remains there. In order to get rid of those black holes we need to add mask layers. Switch to default view. Select the red render layer (which contains red cube) and under mask layers select 2nd and 3rd columns because we need them as mask for the first layer. Repeat the same for all the layers. Remember you need to choose the layers you want to mask. For green, use 1st and 3rd. for blue use 1st and 2nd.
mask layersRender again to see the magic. Jump to composite mode.
composited renderNow we have the cubes in correct order. You can swap the connection and still the render is the same.
We need to explain one more render layer settings named exclude layer. Exclude layer in Blender is used for excluding something from render. For example we have a plane just intersecting the three cubes. We need to render the plane separately without having any shadow or mask, we can use exclude layer. Additional use of exclude layer can be explored on further tutorials.
So add a plane and place it in such a way that it intersects the cubes and faces towards the camera.
intersectMove it to a new scene layer (4).Add a new render layer named plane. Set the render layer. Don’t use any mask layer.
soloJump to composite mode. Add a new alpha over node and a render layer node. Change the render layer to plane. Connect it to the bottom image of 3rd alpha over node. You need to connect the 2nd alpha over node to the top image of 3rd alpha over node. Also connect the 3rd alpha over to the viewer node and composite node. Render to see the result. You should get something like this.
extra node in blenderWe need the plane as it is. Shift to default view and in the render layer settings select the plane render layer. In the exclude layer select 1, 2 and 3 column. Select the entire scene layer and render again. Now we will get blender tutorial
This concludes the render layer in Blender tutorial.
Hope you enjoyed this tutorial. Drop your comments and critiques.

7/24/13

Dynamics glass titling Motion graphics in Blender tutorial.

Today we are going to create awesome motion graphics title effect using Blender. I recently found Blender is an excellent tool for creating motion graphics. It is my first featured Blender tutorial. Hope you enjoy it.
If you don’t know about Blender, Blender is an open source 3d application just like Autodesk Maya, 3ds Max, Cinema 4d and Houdini. There are several discussions about the comparison of Blender with famous 3d application software. I started exploring Blender recently, so I am not able to compare it with any other software. In the near future I will add a comparison between Blender and Maya.
Blender also have advanced node based composite editor and a decent non-linear video editor. This tutorial will use these tools wisely. I would like to thank Blender Diplom for showing the base idea in his tutorial.
Difficulty : Beginner
Software used : Blender 2.68 (You can freely download the latest version from www.blender.org)
Topics covered
· Text editor
· Particle system
· Remesh modifier for retoplogy
· Explode modifier
· Bevel modifier
· Solidify modifier
· Cycles render
· Composite editor
· Video sequence editor.
This tutorial is created with Blender 2.68 (Released a couple of days ago) but you can create this effect using 2.5 and later. I strongly recommend using the latest stable version. Blender can be downloaded free so why you don’t have the latest build.

Preparing Blender for Motion Graphics.

blender motion graphics
Open the blender program. Get of the splash screen by clicking anywhere inside the window. Get rid of the default cube by selecting and deleting (x).

First of all we are going to set up Blender for the best use of its organizational skills. Go to user preferences tab in the file menu (File>user preferences>File). Set the font paths first. I am using Windows 7 operating system. So the font folder is located at C: /windows/fonts. So click on the file button near the font menu and browse to the font directory. Linux and Mac users have to find their own font directory. Select open. You can also set other paths such as textures and sounds. It is advised to set your render output path to a custom folder. Save user settings and close the window.

Adding Text

In the view port, switch to top ortho view (1). Click Add>Text (Shift +a) and place a text in the view port. The text will be placed on the 3d cursor. We need to edit this text. In order to change the letters we need to be in edit mode. Select the edit mode (Tab), press backspace 4 times for deleting the text. Now type your own characters. Here I used FermiCG.net. You can use standard typing shortcuts.
Find the origin tab in the left tool menu, click origin and choose geometry to origin.

Changing the font

Locate the font menu in the right property tab. Locate the font tab. I am using default regular font. So click on the open folder icon in regular font menu and select the desired font. (If you didn’t set the font directory already you need to browse to the font directory).

Changing the text into 3d

Now our text is in 2d. We need it to be in 3d. Click on the extrude tab and use 0.05 extrusion. Now we have a 3d text.

Setting the camera

Camera is very important in motion graphics. The position or the placement of the camera can highly impact your scene, especially in Motion Graphics. So we will set the camera first and do the stimulation and other animation based on the camera. Find the scene menu in the right menu and change the resolution to HDTV 720 P.
In the viewport select the camera by clicking (RMB, in the video I used LMB). Jump to camera view, View> camera (Num pad 0).
We need to align the camera as top ortho. The text should be in the centre. But now it is somewhere like ¾. If you try to rotate the camera Blender will automatically jump to the perspective view. If you did so jump to camera view again and press “N”. This will open a menu in the right side. Find Lock camera to view and turn on. Now we can freely rotate, pan and zoom the camera. Using standard viewport navigation short cuts (RMB, Shift RMB and scrolling MMB) align the camera in such a view that the text is exactly at the centre and facing to the camera. In the right menu change the camera rotation value XYZ to zero.
In the camera property tab turn on safe area. This will help in animation. Never place the text out of the safe title area. This will create a cut text in broadcasting.
You can turn off lock to camera view now.

Converting the text to Polygon.

In order to apply modifiers we should be in polygon mode. So select the text and Object>convert to> mesh from curve/ Meta/ surface/ text (Alt +C). This will convert the text in to an editable poly.
Jump to edit mode (Tab). Look the text is now with improper mesh flow and looks very ugly. We can’t get a nice effect with these kind of mesh flow. We need to clean this mesh and align the vertices properly. Fortunately there is a modifier that automatically does the job.

Remesh modifier for cleaning the mesh.

Jump back to object mode (tab). In the right menu find modifier and Add modifier> Remesh. This will cause the mesh to disappear. May be you can see a fraction of the text. Don’t worry. Turn off the remove disconnected pieces. Still there is no text but some pieces. Increase the octree value to 8. Now the text is visible in the viewport. Now we need to check, how the mesh flow is. Jump to edit mode. ??? Still the same ugly mesh. Where is the modifier? It is there. Jump back to object mode and select wireframe preview (Z). Now you can see the mesh flow. Zoom in and check. But we don’t need so many vertices. So decrease the scale value to 0.75. We need to apply this modifier. So simply press the apply button.

Preparing the mesh for explode.

In order to get a proper explode we are going to convert this 3d text back to 2d. Confused! In order to work with Remesh modifier we used the extruded 3d text. If we used the 2d text, the Remesh modifier will be failed.
Then why we need a 2d text for explode modifier? Explode modifier can work on both 2d and 3d meshes. But if we use 3d mesh with explode modifier you will get uneven polys with no 3d surface.
So select the text and jump to edit mode. Select all the vertices except the bottom layer (use front view, press b and use RMB and drag around the desired vertices). Delete those vertices. Jump back to object mode, now we have a flat clean text mesh with properly aligned vertices.

Explode modifier on text

Add an explode modifier (modifier> Add modifier>explode). Leave the settings as it is. Play the scene. Nothing happens! Don’t worry. We need a particle system with the explode modifier.
Save the scene. You need to browse to a custom directory and give a name.

Adding Particle system

Select the text and go to modifier tab, add a new particle system. Click on particle icon and press the + button. You can play the scene to see the particles in action. First of all we need to tell Blender that we need exact number of particles equals to the polygon count of the text. You can find the number of polygons present in the text by selecting the text in object mode and looking the top right corner of Blender menu. Here it is shown as 1505.
Enter the value in emission number.
Increase the life span to 150.
Turn off random and even distribution.
Reduce the emitter geometry velocity to 0.
Turn on rotation and dynamic.
Change the render type to none because we don’t need the particles in rendering.
Display type to point so we can see the particles.
Turn off gravity field.
Play the scene. You can see now the particles are sticking to the text. Save the scene.

Adding fields

It is time to add some movements to the particles. It can be achieved by adding fields/forces. Add a wind field (Add>field forces>wind. Rename it to wind. Place it to the centre of the text. Change the noice value to 1 and turn off flow value.
Play the scene. Now the particles are blown upwards by the wind.
Add another field named turbulence. Rename it to turbulence. Place it to the centre of the text. Change strength to two and noise to 0.20.
Play the scene to see the result. Now we have some variation in the movement of particles.
Jump to camera view. Now the particles are going away from the camera. We need these particles should come to the camera/ screen. In order to make so add another field named magnetic. Place it just above the camera.
Play the scene. Now the particles are coming to the camera.

Adding texture to control the birth of particles

If you closely watch the particles are generated in a non linear way, we need the particles in such a way that first letter should be formed first, followed by second and so on. Simply adding a ramp texture will fix the problem.
Go to texture tab and select the particle texture. Add a new texture and change it to blend from cloud. Optioanlly turn on ramp. Play the scene. Now you will get the exact flow.

Changing the modifier stack order

We need explode to work with particle. We have everything set up for explode modifier. But the problem is the explode modifier is above the particle modifier. Blender will calculate these modifiers as layers. So the first modifier is calculated first then the second. In order to fix the problem click the up arrow button find right to the particle system. This will move the particle system above the explode modifier layer. Play to see the magic.

Solidify and bevel modifier

If you zoom to the text explode mesh, we have the same 2d mesh. In order to make it 3d add a solidify modifier and change the thickness to 0.05. Leave the rest default. Add another modifier named Bevel and use the default. This will smooth the edges.

Adding materials, Using Cycle render

We finished our animation/ stimulation. It is time to add some materials. We are going to render this scene in Cycles render. So change to cycles render in render settings.
Select the text and click on material tab and add a material by clicking the + button. Click on use nodes. Select Glass BSDF as preset. Leave the settings default. You can check the rendering by pressing render button (F12) or turn on view port rendering (display mode to rendered). But the rendering is not good; the glass blocks are no longer looks like glass. We can fix it later.

Adding an emission plane ( Indirect lighting in Cycles)

Cycles can easily stimulate indirect lighting. We will use this feature. Select the default light in the scene and delete. Add a polygonal plane. Scale it to cover the explosion and move it above the camera. Add a material and use emission as preset node. Leave the rest default. This will give enough lighting and white reflection to the glass. Render to see the result. If you feel your scene is too dark, increase the emission rate. But we can boost it while compositing. So I leave it default.

Tweaking the render for better quality

In the render tab select GPU as rendering device. Please note that only CUDA powered NVidia graphics card are supported. If you don’t have those types of card leave it to CPU. GPU rendering is fast compared to CPU.
Find the transparent option and turn on. This will get rid of the default grey BG in the render.
In the world tab, click on use nodes under background in Surface. Add an environment texture to the colour by clicking the + button. Click open and use an appropriate HDRI map. (HDRI map in Blender).
Render to see the result. Now the glass blocks getting reflection and colour according to the background image. We can change the colour later on compositing. We need to get rid of the noises from the rendering.
Find the sampling tab under render settings and change the following values.
Render samples = 100
Max transparency = 24
Max bounces = 16
Glossy value = 256
Filter glossiness = 0.5
Find the render output and set the output path to desired folder. Also use png as output image. Select RGBA instead RGB.
Render again to see the result. You have to wait for a long time than before.
Save the scene.

Compositing before finishing the whole render

Blender can composite your renderings before finishing the full render. You need only a full render of a frame. After compositing you can render the whole scene.
Select the compositing preset in the top. Change the default to compositing.
Turn on node, free unused, back drop and auto render.
Expand the work area by dragging the both right and bottom corner. Click on the nodes and arrange it. Move the render layer node to the left and composite node to right.
Click Add>output> viewer. Place the view node to the right. Click on the small circle right in the image of render layer node (render layer.image output) to the input image of viewer (Viewer.image input).
This will shows the render image as background.
Move the viewer node after the composite. You can scale the nodes to get some space.
Add>input>image. This will create an image input node in which we can add external images for compositing. Here we will use a background image.
We need to connect the background and our render image. In order to do we usually use mix node. But here we have our render output with alpha and we want the alpha over the image. Yes we need an alpha over node.
Add>colour>alpha over.
Connect render layer.image output to the second image node (bottom) of alpha over. Add image.output image to alpha over nodes first image.
Also connect the alpha over. Image output to composite. Image input and viewer.image input.
Click open in the image node and select desired background image. I used a grey scale grungy surface with a higher dimension than our render.
Now the background will show the image. You can see the image is scaled (if the image is different from the render resolution).
We need to crop it to the render size. If we don’t we will get the final composit with the size of the highest resolution, here equal to the image.
Add>distort>scale.
Connect the image to the scale. Also connect the scale to the alpha over. (you can automatically connect it by dragging and dropping between the desired nodes.
Use render size and crop.
Now we need to fix the render. The colour is looking odd. So
Add>colour>hue saturation value.
Connect it between alpha over and render layer nodes. And change
Hue=0.927
Saturation=0.745
Value=1.236
Connect another hue saturation value node between background image and scale. Change the values accordingly.
Saturation = 0.436
I used a grey scale texture so hue and saturation have no effect.
Now the rendering looks pretty good. We need to add some glare to the glass.
Add>filter>glare
Connect it between hue saturation value of render layer and alpha over nodes and change
Quality = high
Threshold= 0.25
Colour modulator = 0.75
Finally
Add>output>file output
Connect alpha over node to file output.
You can change the render settings in file output node. I used a custom folder for saving the composite images than the raw render. Also changed the end frame to 320.
Finally render the animation. Wait for the render to finish. Depending on your system configuration and scene size it will take couple of hours.

Editing in Video sequence editor

In Blender’s internal video sequence editor we will be doing
Reversing the render footage.
Adding music, water mark.
Open a new blender and delete default cube and light. Change to Video editor work space. Click on the left graph window and change it to properties window.
Add>image and browse to the composited image directory. Select the first image and drag select all the images in that sequence. In the left bottom corner change the channel to two and start frame to 1.Press open.
This will open the image sequence in the timeline.
In the property tab select HDTV 720 p as the rendering dimension. In the right menu find video filter and turn on backwards. Blender will play the video backwards. Change the end frame to 400. The problem is my video is 320 frames. Click and drag the right arrow in the video to the right. Now blender will place the last frame to the end of the sequence. Play to see the result.
Add>image and browse to a water mark image. I used a HD 720 p png image with alpha. In the left bottom corner change the channel to 3 and start frame to 1. Click open.
Now the problem is Blender is showing only the water mark image. We can fix it. Remember alpha over node. In the right property tab and change the mode to alpha over from blend.
Finally add>music and browse to the music folder. Select music and change the channel to 1 and start frame to 1. Click open.
Play the scene.
It is time to render the video output. In the property tab select the output path and give desired name. Change the output format and container to desired codec. I am using h.264 in both field.
Remember to select the correct audio codec. I am using mp3 because my original audio is in mp3.
Press render animation and wait for the render to finish.
Hope you enjoy this tutorial. Share it with your friends and family. Also add your valuable comment and feedback.

6/28/13

After effects tutorial-Hack GPU ray tracing for unsupported cards

Today we are going to hack GPU ray tracing in After Effects. After effects CS6 is capable of doing GPU ray tracing. But due to the limited official support all the cuda powered graphics card are not available for this purpose in After Effects. But the fact is that we can simply enable the GPU ray tracing for unsupported graphics cards also. You need the CUDA powered NVidia graphics card. Simply follow the following procedure and you can get the GPU acceleration for Ray tracing.
Anyway this technique is not officially supported but you can get a good amount of acceleration in previewing and rendering. If you do not have a cuda card or your GPU memory is below 1 GB please do not try this technique.
Watch the video tutorial at the end of this page.
  • Open after effects.
  • Check whether your graphics card is capable of GPU ray tracing with in After Effects.
  • Go to edit, preferences, previews.
  • Click on the g p u information tab.
  • You can see my graphics card information and capabilities are shown here.
  • Under ray tracing you can see CPU is selected and a warning says GPU is not available is shown.
  • Under open GL tab you can see that my graphics card is Nvidia geforce 425 M, which is a cuda capable card.
  • But under cuda settings nothing is shown. It is because this card is officially not supported by after effects.
  • We can simply enable this card for cuda powered ray tracing.
  • Just note the name of the graphics card displayed in open GL section.
  • Close After Effects.
  • Go to Program files, Adobe, Adobe After Effects CS 6, Support Files and find ray tracer supported cards text document.
  • Open it in a text editor.
  • See my graphics card is not listed here.
  • Simply add the name of graphics card exactly the same as displayed in After Effects.
  • Save and replace the file.
  • Due to the restriction in windows 7, I was forced to save it in desktop.
  • We need to replace the file now. Drag and drop the file to the original location.
  • Replace the original file with the edited one.
  • Open the After Effects .
  • Check the GPU information once again.
  • See now we have GPU available for ray tracing.
  • And now after effects is showing the cuda properties of the graphics card.
  • Now we can switch between GPU and CPU.
  • If you are experiencing any problem after enabling this technique simply switch back to CPU.
Check this technique and share your experience below.


4/2/13

Blender for Maya artist 01- Settings


Blender is a wonderful free software with amazing 3d capabilities. Being opensource every one can produce, share, compile Blender with out any cost. Don't mis judge Blender because it is freely available. It is very powerful as other 3d software such as Autodesk Maya, 3ds max, Cinema 4d and Houdini. Blender have both advantage and disadvantage over these commercial 3d applications. It is true more and more artist learning to use Blender.

You can produce your own movie in Blender with out spending thousands of bucks!!!( a single Maya licence cost more than 3000 dollars). More Maya artist use Blender in their home. It is true there are several studios who uses Blender for their production.
Anyway I am so much interested in Blender. At first it was very difficult to learn Blender. Being a Maya artist shifting to a new 3d program is little bit confusing. It took a whole while to start things perfect for me. It is impossible to drop Maya and using Blender and Maya in same day is totally confusing. Anyway Blender have some preset for Maya artist. So started using that and now I use Maya in studio and Blender in House.

This tutorial is meant for Maya artist. So some of the common shortcuts and other items may not work correctly if you follow the default Blender document and tutorials.